In this tutorial, we’ll guide you through the process of creating your very own PHP CRUD API Generator. By the end of this hopefully, you’ll not only have a deeper understanding of dynamic API generation but also a ready-to-use tool to simplify your development workflow. Before we go into the programming side of things let’s talk about what this actually is.
What Is a PHP CRUD API Generator?
The PHP CRUD API Generator is a web-based application that generates a full-featured CRUD API for any database table you specify. With just a table name, its columns, and a primary key, this tool generates an API file that you can use to interact with your database.
Key Features:
- Dynamic: Works with any table in your database.
- Flexible: Generates APIs that support Create, Read, Update, and Delete operations.
- Reusable: Generated files can be integrated into any project.
Why Build This Tool?
- Efficiency: No need to manually write CRUD code for every table.
- Scalability: Works with any database table.
- Reusability: Generated files are plug-and-play.
So now the Why and Features part is laid out let’s get started with programming side of things.
Step-by-Step Guide to Building the PHP CRUD API Generator
Here’s how you can create your own CRUD API Generator in PHP:
Step 1: Set Up Your Development Environment
Before diving into the code, ensure you have the following:
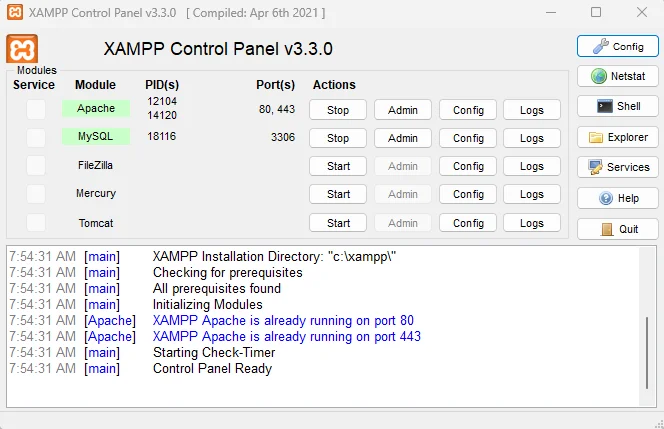
- A local server environment (e.g., XAMPP or WAMP).
- A MySQL database with at least one table.
- A code editor (e.g., VS Code).
Step 2: Create the Main Generator Script
Start by creating a file named crud_api_generator.php and paste the following code:
<?php
// Dynamic CRUD API Generator

if ($_SERVER['REQUEST_METHOD'] === 'POST') {
    $tableName = htmlspecialchars($_POST['table_name'] ?? '');
    $columns = htmlspecialchars($_POST['columns'] ?? '');
    $primaryKey = htmlspecialchars($_POST['primary_key'] ?? '');

    if (empty($tableName) || empty($columns) || empty($primaryKey)) {
        die('Error: Table name, columns, and primary key are required.');
    }

    $apiCode = generateCRUD($tableName, $columns, $primaryKey);
    $fileName = $tableName . "_crud_api.php";

    if (file_put_contents($fileName, $apiCode)) {
        echo "File '$fileName' created successfully.";
    } else {
        echo "Error: Unable to create file.";
    }
    exit;
}

function generateCRUD($tableName, $columns, $primaryKey)
{
    $columnsArray = explode(',', $columns);
    $columnsArray = array_map('trim', $columnsArray);
    $columnsList = implode(', ', $columnsArray);
    $placeholders = implode(', ', array_fill(0, count($columnsArray), '?'));

    $code = <<<PHP
<?php
// CRUD API for table: $tableName

require 'db_config.php';

header('Content-Type: application/json');

try {
    \$pdo = new PDO(\$dsn, \$username, \$password, \$options);
    \$pdo->setAttribute(PDO::ATTR_ERRMODE, PDO::ERRMODE_EXCEPTION);
} catch (PDOException \$e) {
    echo json_encode(['error' => 'Database connection failed', 'details' => \$e->getMessage()]);
    exit;
}

// CREATE
function create(\$pdo) {
    \$data = json_decode(file_get_contents('php://input'), true);

    if (!\$data) {
        echo json_encode(['error' => 'Invalid input']);
        return;
    }

    \$sql = "INSERT INTO $tableName ($columnsList) VALUES ($placeholders)";
    \$stmt = \$pdo->prepare(\$sql);

    try {
        \$stmt->execute(array_values(\$data));
        echo json_encode(['id' => \$pdo->lastInsertId()]);
    } catch (PDOException \$e) {
        echo json_encode(['error' => 'Insert failed', 'details' => \$e->getMessage()]);
    }
}

// READ ALL
function readAll(\$pdo) {
    \$stmt = \$pdo->query("SELECT * FROM $tableName");
    echo json_encode(\$stmt->fetchAll(PDO::FETCH_ASSOC));
}

// READ SINGLE
function readSingle(\$pdo, \$id) {
    \$stmt = \$pdo->prepare("SELECT * FROM $tableName WHERE $primaryKey = ?");
    \$stmt->execute([\$id]);
    echo json_encode(\$stmt->fetch(PDO::FETCH_ASSOC));
}

// UPDATE
function update(\$pdo, \$id) {
    \$data = json_decode(file_get_contents('php://input'), true);

    if (!\$data) {
        echo json_encode(['error' => 'Invalid input']);
        return;
    }

    \$setString = implode(', ', array_map(fn(\$col) => "\$col = ?", array_keys(\$data)));
    \$sql = "UPDATE $tableName SET \$setString WHERE $primaryKey = ?";
    \$stmt = \$pdo->prepare(\$sql);

    try {
        \$stmt->execute([...array_values(\$data), \$id]);
        echo json_encode(['status' => 'success']);
    } catch (PDOException \$e) {
        echo json_encode(['error' => 'Update failed', 'details' => \$e->getMessage()]);
    }
}

// DELETE
function delete(\$pdo, \$id) {
    \$stmt = \$pdo->prepare("DELETE FROM $tableName WHERE $primaryKey = ?");
    try {
        \$stmt->execute([\$id]);
        echo json_encode(['status' => 'success']);
    } catch (PDOException \$e) {
        echo json_encode(['error' => 'Delete failed', 'details' => \$e->getMessage()]);
    }
}

\$action = \$_GET['action'] ?? '';
\$id = \$_GET['id'] ?? null;

switch (\$action) {
    case 'create':
        create(\$pdo);
        break;
    case 'read':
        if (\$id) {
            readSingle(\$pdo, \$id);
        } else {
            readAll(\$pdo);
        }
        break;
    case 'update':
        if (\$id) {
            update(\$pdo, \$id);
        } else {
            echo json_encode(['error' => 'ID is required for update']);
        }
        break;
    case 'delete':
        if (\$id) {
            delete(\$pdo, \$id);
        } else {
            echo json_encode(['error' => 'ID is required for delete']);
        }
        break;
    default:
        echo json_encode(['error' => 'Invalid action']);
        break;
}
?>
PHP;

    return $code;
}
?>

<!DOCTYPE html>
<html lang="en">
<head>
    <meta charset="UTF-8">
    <meta name="viewport" content="width=device-width, initial-scale=1.0">
    <title>CRUD API Generator</title>
</head>
<body>
    <h1>CRUD API Generator</h1>
    <form method="POST">
        <label for="table_name">Table Name:</label>
        <input type="text" name="table_name" id="table_name" required><br><br>

        <label for="columns">Columns (comma-separated):</label>
        <input type="text" name="columns" id="columns" required><br><br>

        <label for="primary_key">Primary Key:</label>
        <input type="text" name="primary_key" id="primary_key" required><br><br>

        <button type="submit">Generate API</button>
    </form>
</body>
</html>
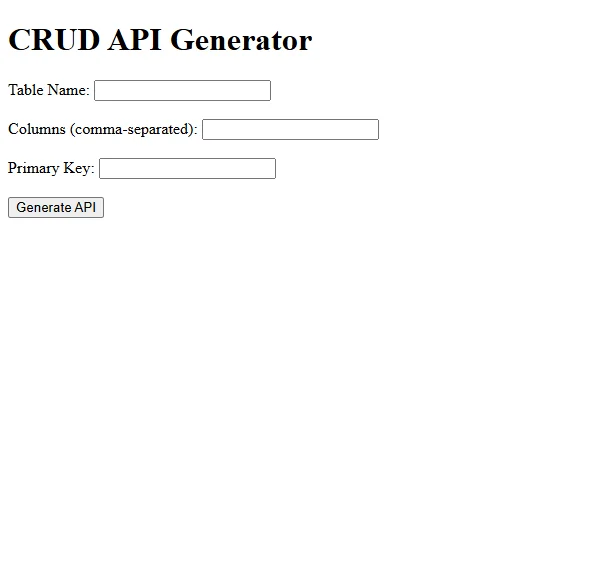
This code is your front-end and backend. This script dynamically generates a PHP API file based on the inputs you provide. The form lets users input the table name, columns, and primary key. Image below shows the output of this script
So now to actually generate an API we need to configure a database and also need to create table and some placeholder columns thus let’s move on to the next part
Step 3: Create & Configure your Database
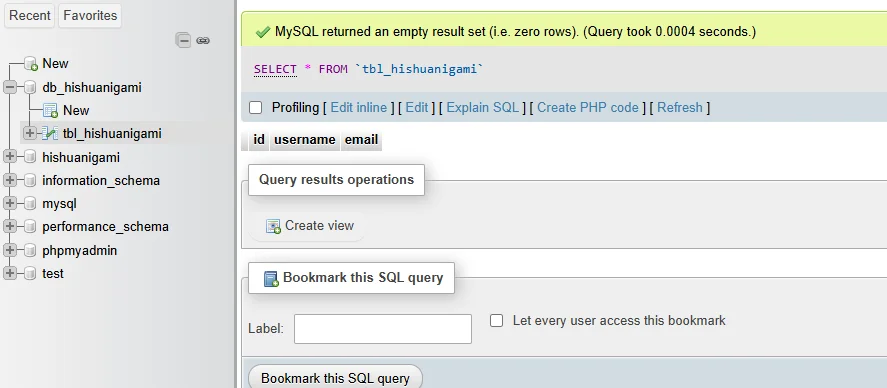
In this tutorial, I will be utilizing the XAMPP local server to create a sample database named db_hishuanigami. Within this database, I have established a table by the name of tbl_hishuanigami featuring a primary key, id, along with two additional columns for username and email.
Now that the creation and configuration is done let’s move to next step and that is …
Step 4: Writing Configuration Script db_config.php
<?php
$dsn = 'mysql:host=localhost;dbname=db_hishuanigami';
$username = 'root';
$password = '';
$options = [
    PDO::ATTR_ERRMODE => PDO::ERRMODE_EXCEPTION,
    PDO::ATTR_DEFAULT_FETCH_MODE => PDO::FETCH_ASSOC,
];
?>
Now that we have setup dummy database with a table, we can now input the fields in the crud_api_generator.php
Working of PHP API Generator
The creation and setup part are done, now let’s see the working of this bad boy in action. Simply go the location where crud_api_generator.php is located on your system and open it and then fill in the details of your created database.
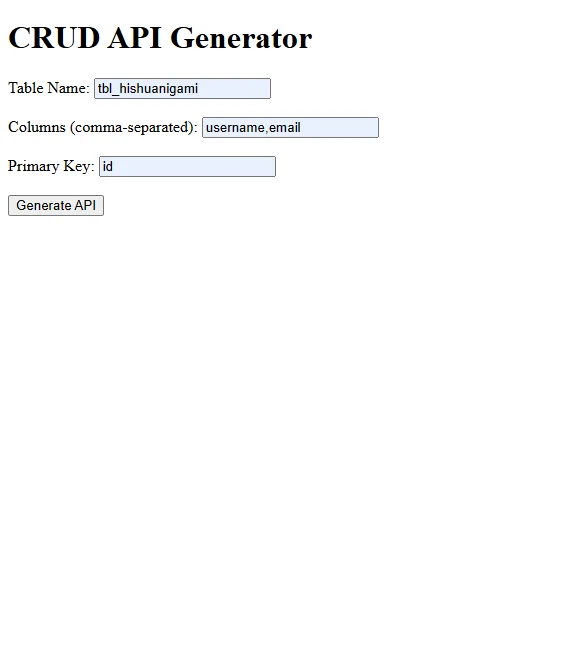
- User Input: The form collects the table name, columns, and primary key.
- Dynamic Code Generation: The
generateCRUDfunction creates API code with endpoints for Create, Read, Update, and Delete operations. - File Creation: The generated API is saved as a PHP file in the project directory.
- API Usage: The generated file supports HTTP methods for interacting with the database:
POSTfor CreateGETfor ReadPUTfor UpdateDELETEfor Delete
Upon clicking on Generate API with get this response
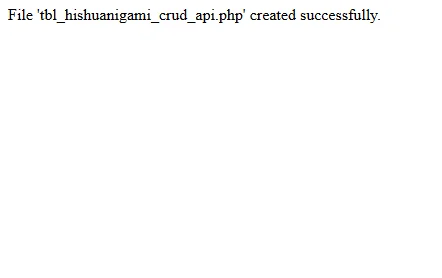
Now that the response is good, we can see the output in the form of file, created in the same directory. In my case the name of the file is tbl_hishuanigami_crud_api.php in your case it will probably be your created table name+_crud_api.php
The code inside the tbl_hishuanigami_crud_api.php is given below
<?php
// CRUD API for table: tbl_hishuanigami

require 'db_config.php';

header('Content-Type: application/json');

try {
    $pdo = new PDO($dsn, $username, $password, $options);
    $pdo->setAttribute(PDO::ATTR_ERRMODE, PDO::ERRMODE_EXCEPTION);
} catch (PDOException $e) {
    echo json_encode(['error' => 'Database connection failed', 'details' => $e->getMessage()]);
    exit;
}

// CREATE
function create($pdo) {
    $data = json_decode(file_get_contents('php://input'), true);

    if (!$data) {
        echo json_encode(['error' => 'Invalid input']);
        return;
    }

    $sql = "INSERT INTO tbl_hishuanigami (username, email) VALUES (?, ?)";
    $stmt = $pdo->prepare($sql);

    try {
        $stmt->execute(array_values($data));
        echo json_encode(['id' => $pdo->lastInsertId()]);
    } catch (PDOException $e) {
        echo json_encode(['error' => 'Insert failed', 'details' => $e->getMessage()]);
    }
}

// READ ALL
function readAll($pdo) {
    $stmt = $pdo->query("SELECT * FROM tbl_hishuanigami");
    echo json_encode($stmt->fetchAll(PDO::FETCH_ASSOC));
}

// READ SINGLE
function readSingle($pdo, $id) {
    $stmt = $pdo->prepare("SELECT * FROM tbl_hishuanigami WHERE id = ?");
    $stmt->execute([$id]);
    echo json_encode($stmt->fetch(PDO::FETCH_ASSOC));
}

// UPDATE
function update($pdo, $id) {
    $data = json_decode(file_get_contents('php://input'), true);

    if (!$data) {
        echo json_encode(['error' => 'Invalid input']);
        return;
    }

    $setString = implode(', ', array_map(fn($col) => "$col = ?", array_keys($data)));
    $sql = "UPDATE tbl_hishuanigami SET $setString WHERE id = ?";
    $stmt = $pdo->prepare($sql);

    try {
        $stmt->execute([...array_values($data), $id]);
        echo json_encode(['status' => 'success']);
    } catch (PDOException $e) {
        echo json_encode(['error' => 'Update failed', 'details' => $e->getMessage()]);
    }
}

// DELETE
function delete($pdo, $id) {
    $stmt = $pdo->prepare("DELETE FROM tbl_hishuanigami WHERE id = ?");
    try {
        $stmt->execute([$id]);
        echo json_encode(['status' => 'success']);
    } catch (PDOException $e) {
        echo json_encode(['error' => 'Delete failed', 'details' => $e->getMessage()]);
    }
}

$action = $_GET['action'] ?? '';
$id = $_GET['id'] ?? null;

switch ($action) {
    case 'create':
        create($pdo);
        break;
    case 'read':
        if ($id) {
            readSingle($pdo, $id);
        } else {
            readAll($pdo);
        }
        break;
    case 'update':
        if ($id) {
            update($pdo, $id);
        } else {
            echo json_encode(['error' => 'ID is required for update']);
        }
        break;
    case 'delete':
        if ($id) {
            delete($pdo, $id);
        } else {
            echo json_encode(['error' => 'ID is required for delete']);
        }
        break;
    default:
        echo json_encode(['error' => 'Invalid action']);
        break;
}
?>
Using & Testing the Generated API
To use the generated API we need to first hit the generated API link with action parameter in our case the url was http://localhost/hishuanigami/tbl_hishuanigami_crud_api.php, thus we will write a script that hits this link with the action parameter to create a new user in the database (action=create)
The script to hit the API with POST is given below.
<?php
// URL of the API
$url = 'http://localhost/hishuanigami/tbl_hishuanigami_crud_api.php?action=create';

// Parameters to send
$data = [
    'username' => 'hishuanigami_testuser',
    'email' => '[email protected]',
];

// Initialize cURL
$ch = curl_init($url);

// Set cURL options
curl_setopt($ch, CURLOPT_RETURNTRANSFER, true);
curl_setopt($ch, CURLOPT_POST, true);
curl_setopt($ch, CURLOPT_HTTPHEADER, ['Content-Type: application/json']);
curl_setopt($ch, CURLOPT_POSTFIELDS, json_encode($data));

// Execute the request and capture the response
$response = curl_exec($ch);

// Check for errors
if (curl_errno($ch)) {
    echo 'cURL Error: ' . curl_error($ch);
} else {
    // Print the response from the server
    echo 'Response: ' . $response;
}

// Close cURL session
curl_close($ch);
?>
After running this script, we get this response, shown in the image below

Now let’s test out if the data is added into the database or not, we simply hit this API again but now we use the action=read, we don’t need a separate script for this as this is just a simple get request just visit the location http://localhost/hishuanigami/tbl_hishuanigami_crud_api.php?action=read
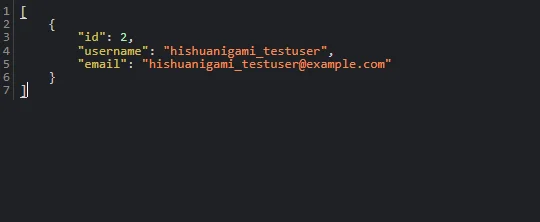
We can also use tools like Postman or cURL. Below are examples of how to use these methods to test each CRUD operation.
1. Create a Record (POST)
To add a new record to your database, use the POST method. Here’s how to do it with Postman:
- Set the request type to POST.
- Enter the URL:
http://localhost/hishuanigami/tbl_hishuanigami_crud_api.php?action=create. - In the Body tab, select raw and set the type to JSON. Enter the data you want to send
{
 "username": "testuser", "email": "[email protected]"
} - Send the request. You should receive a response with the newly created record ID.
2. Read All Records (GET)
To fetch all records from the table:
- Set the request type to GET.
- Enter the URL:
http://localhost/hishuanigami/tbl_hishuanigami_crud_api.php?action=read. - Send the request. You should receive a JSON response containing all records from the table.
3. Read a Single Record (GET)
To fetch a specific record by its ID:
- Set the request type to GET.
- Enter the URL:
http://localhost/hishuanigami/tbl_hishuanigami_crud_api.php?action=read&id=1(replace1with the actual ID you want to retrieve). - Send the request. You should receive a JSON response with the specified record.
4. Update a Record (PUT)
To update an existing record:
- Set the request type to PUT.
- Enter the URL:
http://localhost/hishuanigami/tbl_hishuanigami_crud_api.php?action=update&id=1(replace1with the actual ID you want to update). - In the Body tab, select raw and set the type to JSON. Enter the updated data
{
"username": "updateduser", "email": "[email protected]"
} - Send the request. You should receive a success message indicating the update was successful.
5. Delete a Record (DELETE)
To delete a record:
Send the request. You should receive a success message indicating the record was deleted.
Set the request type to DELETE.
Enter the URL: http://localhost/hishuanigami/tbl_hishuanigami_crud_api.php?action=delete&id=1 (replace 1 with the actual ID you want to delete).
Disclaimer and Improvement Suggestions
While your CRUD API is functional, we recommend implementing the following improvements for enhanced reliability and security:
- Input Validation: Ensure that input data adheres to expected formats, such as proper email validation, to prevent invalid data submissions.
- Security Measures: Implement authentication mechanisms, such as API keys or JSON Web Tokens (JWT), to safeguard your API endpoints from unauthorized access.
- Error Logging: Introduce logging capabilities to capture errors and monitor API usage, aiding in debugging and performance analysis.
- API Documentation: Create comprehensive documentation for your API endpoints, including request and response formats along with examples. This will facilitate easier understanding and usage for future developers and users.
Conclusion
Congratulations! 😊 You’ve successfully built a PHP CRUD API Generator that generates a fully functional API for any specified database table. This tool not only streamlines the development process but also allows for easy interaction with your database through standard HTTP methods.
Feel free to expand upon this project by adding features such as user authentication, API versioning, or more advanced error handling. Enjoy coding!
If you have any feedback or suggestions do comment down below!
You can learn how to How to Build Your Own Simple PHP Framework 🎉🎉 or Create a Dynamic PHP Routing System from Scratch
