In this Blog we will be going through the process of creating a simple web application that will be your own Random anime image generator using Nekosia own Nekosia.js npm package. Nekosia is a simple API/package that lets you fetch images based on different anime Image categories, we will be utilizing that and create a simple web application that allows user to fetch random image based on selected category/tag.
Here is a bit about Nekosia source https://nekosia.cat/about
Nekosia API is a comprehensive and user-friendly RESTful API designed to offer you a wide range of endpoints for integration into your applications and projects. This versatile API allows for seamless and efficient interaction, enabling you to enhance your applications with additional functionalities at no cost. Notably, the Nekosia API is entirely free to use and does not require an API key for accessing its endpoints.
So here is the list of things we will be going through, feel free to jump around if you want. Now let’s begin creating our own Random anime image generator
Table of Contents
Setting up the Environment
Initialization
First, we need to set up the environment. Assuming you have node and npm set up on your local machine we will not talk about that part. First create a directory and initialzie a Node js project
npm init -y Dependencies
Now we need to install the Dependencies that we will be utilizing i.e
npm install express npm install nekosia.js
Now that the dependencies are installed and set up, we will create a file structure to set up our project.
Project Structure
The file structure would be like this, you can have different structure if you are using different logic or any framework but if you want to follow this guide you can just create this one.
HishuAniGami-Nekosia-Image-API/
├── public/
│   ├── index.html
│   ├── styles.css
│   ├── script.js
├── server.js
├── package.json
├── package-lock.json
├── node_modules/
Now that the environment and files are set up let’s write some code.
Writing the Code of your own Random Anime Image Generator API
Lets first start with the front-end first we will handle all the public files as they are easier and just simple code without any specific logic involved.
HTML (public/index.html)
<!DOCTYPE html>
<html lang="en">
<head>
  <meta charset="UTF-8">
  <meta name="viewport" content="width=device-width, initial-scale=1.0">
  <title>Nekosia Image Generator</title>
  <link rel="stylesheet" href="styles.css">
</head>
<body>
  <div class="container">
    <h1>Nekosia Image Generator</h1>
    <div class="controls">
      <label for="tag-select">Choose a tag:</label>
      <select id="tag-select">
        <option value="" disabled selected>Select a tag</option>
      </select>
      <button id="generate-button">Generate Image</button>
    </div>
    <div id="image-container">
      <p>No image generated yet.</p>
    </div>
  </div>
  <script src="script.js"></script>
</body>
</html>
CSS (public/styles.css)
body {
  margin: 0;
  font-family: Arial, sans-serif;
  background-color: #ffebf0; /* Light pink background */
  color: #333;
  display: flex;
  justify-content: center;
  align-items: center;
  height: 100vh;
  overflow: hidden;
}

.container {
  text-align: center;
  padding: 20px;
  border-radius: 10px;
  background-color: white;
  box-shadow: 0 4px 8px rgba(0, 0, 0, 0.2);
}


h1 {
  font-size: 2rem;
  color: #d63384; /* Giga pink */
}


.controls {
  margin-bottom: 20px;
}

label {
  font-size: 1.2rem;
  margin-right: 10px;
}

select {
  padding: 10px;
  font-size: 1rem;
  border: 1px solid #ccc;
  border-radius: 5px;
}

button {
  padding: 10px 20px;
  margin-left: 10px;
  background-color: #d63384; /* Giga pink */
  color: white;
  font-size: 1rem;
  border: none;
  border-radius: 5px;
  cursor: pointer;
  transition: background-color 0.3s ease;
}

button:hover {
  background-color: #bf2d70; /* Another darker pink */
}

/* Image container */
#image-container {
  margin-top: 20px;
}

#image-container img {
  max-width: 100%; /* Fit the image within its container */
  max-height: 400px; /* the height limit */
  border: 3px solid #d63384; /* Pinkish border */
  border-radius: 10px;
  box-shadow: 0 4px 8px rgba(0, 0, 0, 0.2);
}

#image-container p {
  font-size: 1rem;
  color: #666;
}
JavaScript (public/script.js)
async function fetchTags() {
  try {
    const response = await fetch('/api/tags');
    const data = await response.json();
    if (data.success) {
      const tags = data.tags;
      const tagSelect = document.getElementById('tag-select');
      tags.forEach(tag => {
        const option = document.createElement('option');
        option.value = tag;
        option.textContent = tag;
        tagSelect.appendChild(option);
      });
    } else {
      console.error('Failed to fetch tags:', data);
    }
  } catch (error) {
    console.error('Error fetching tags:', error);
  }
}

async function generateImage() {
  const selectedTag = document.getElementById('tag-select').value;
  const imageContainer = document.getElementById('image-container');

  imageContainer.innerHTML = '<p>Loading...</p>';
  try {
    const response = await fetch(`/api/images?tag=${encodeURIComponent(selectedTag)}`);
    const data = await response.json();
    if (data.success) {
      const imageUrl = data.imageUrl; // Use the compressed image URL
      imageContainer.innerHTML = `
        <img src="${imageUrl}" alt="${selectedTag}">
        <p>Source: <a href="${data.sourceUrl}" target="_blank">Original</a></p>
      `;
    } else {
      imageContainer.innerHTML = '<p>No images available for the selected tag.</p>';
    }
  } catch (error) {
    console.error('Error generating image:', error);
    imageContainer.innerHTML = '<p>Failed to generate image.</p>';
  }
}

// Initialize
document.getElementById('generate-button').addEventListener('click', generateImage);
fetchTags();
If you want to learn about how to create your own anime waifu in Ollama then How to Customize Your own Ollama Model or if you want to create a discord bot Discord TTS Bot: Create Your Own TTS Bot for Discord
JavaScript (sever.js)
As the server.js holds the backend for our Random Anime Image Generator and deals with all the logic, instead of pasting down the whole code of Random Anime Image generator like above I’ll try to explain each step one at a time to actually tell you what is happening. So, let’s talk about each step one by one
Import Required Modules
const express = require('express');
const { NekosiaAPI } = require('nekosia.js');
const fs = require('fs').promises;
express: Server for BackendNekosiaAPI: Handles all interactions with the Nekosia API.fs.promises: File system module for async reading/writing.
Initialize App Variables
const app = express();
const PORT = 3000;
const TAGS_FILE = './tags.json';
app: Initializes an Express app.PORT: Sets the port to 3000. Access it athttp://localhost:3000.TAGS_FILE: Stores cached tags to reduce redundant API calls. (Using the fs module for this)
Check if Tags File is Empty
Why are we checking if Tags file is empty well we don’t want to make unnecessary calls to the API to retrieve the same data, thus when we first make the call we simply save the tags in JSON file and check if it is empty or not whenever we run the get tags function, if it is not empty then just use the cache tags. (There are probably better ways of doing this but for now this will work 😊)
async function isTagsFileEmpty() {
  try {
    const stats = await fs.stat(TAGS_FILE);
    if (stats.size === 0) return true;

    const content = await fs.readFile(TAGS_FILE, 'utf8');
    return !content.trim();
  } catch (error) {
    if (error.code === 'ENOENT') return true;
    throw error;
  }
}
Fetch and Cache Tags
function fetchAndCacheTags() {
  if (await isTagsFileEmpty()) {
    try {
      console.log('Fetching tags from Nekosia API...');
      const response = await NekosiaAPI.fetchTags();
      if (response.success) {
        await fs.writeFile(TAGS_FILE, JSON.stringify(response.tags, null, 2));
        console.log('Tags cached successfully.');
      } else {
        console.error('Failed to fetch tags:', response.message);
      }
    } catch (error) {
      console.error('Error fetching tags:', error);
    }
  } else {
    console.log('Tags file already exists and is not empty. Skipping fetch.');
  }
}
Serve Static Files
Serve files like index.html, script.js, and styles.css from the public folder.
app.use(express.static('public'));
Tags API Endpoint
app.get('/api/tags', async (req, res) => {
  try {
    const tagsData = await fs.readFile(TAGS_FILE, 'utf8');
    const tags = JSON.parse(tagsData);
    res.json({ success: true, tags });
  } catch (error) {
    console.error('Error reading tags file:', error);
    res.status(500).json({ success: false, message: 'Failed to load tags.' });
  }
});
Image API Endpoint
app.get('/api/images', async (req, res) => {
  const { tag } = req.query;
  if (!tag) {
    return res.status(400).json({ success: false, message: 'Tag is required.' });
  }
  try {
    const response = await NekosiaAPI.fetchCategoryImages(tag);
    if (response.success) {
      res.json({
        success: true,
        imageUrl: response.image.compressed.url,
        sourceUrl: response.source.url,
      });
    } else {
      res.status(500).json({ success: false, message: 'Failed to fetch image.' });
    }
  } catch (error) {
    console.error('Error fetching image:', error);
    res.status(500).json({ success: false, error: error.message });
  }
});
Start the Server
app.listen(PORT, async () => {
  console.log(`Server is running on http://localhost:${PORT}`);
  try {
    await fetchAndCacheTags();
  } catch (error) {
    console.error('Error initializing server:', error);
  }
});
Whole Backend Logic
Below is the code for all the backend logic and then the explanation is also provided.
Source Code server.js
const express = require('express');
const { NekosiaAPI } = require('nekosia.js');
const fs = require('fs').promises;

const app = express();
const PORT = 3000;
const TAGS_FILE = './tags.json';

// Function to check if tags file is empty
async function isTagsFileEmpty() {
  try {
    const stats = await fs.stat(TAGS_FILE);
    if (stats.size === 0) {
      return true; // File exists but is empty
    }
    const content = await fs.readFile(TAGS_FILE, 'utf8');
    return !content.trim(); // Check if the file has non-whitespace content
  } catch (error) {
    if (error.code === 'ENOENT') {
      return true; // File does not exist
    }
    throw error; // Rethrow unexpected errors
  }
}

// Function to fetch and cache tags if the file is empty
async function fetchAndCacheTags() {
  if (await isTagsFileEmpty()) {
    try {
      console.log('Fetching tags from Nekosia API...');
      const response = await NekosiaAPI.fetchTags();
      if (response.success) {
        const tags = response.tags;
        await fs.writeFile(TAGS_FILE, JSON.stringify(tags, null, 2));
        console.log('Tags cached successfully.');
      } else {
        console.error('Failed to fetch tags:', response.message);
      }
    } catch (error) {
      console.error('Error fetching tags:', error);
    }
  } else {
    console.log('Tags file already exists and is not empty. Skipping fetch.');
  }
}

// Middleware to serve static files
app.use(express.static('public'));

// API endpoint to get tags
app.get('/api/tags', async (req, res) => {
  try {
    const tagsData = await fs.readFile(TAGS_FILE, 'utf8');
    const tags = JSON.parse(tagsData);
    res.json({ success: true, tags });
  } catch (error) {
    console.error('Error reading tags file:', error);
    res.status(500).json({ success: false, message: 'Failed to load tags.' });
  }
});

// API endpoint to fetch images by category
app.get('/api/images', async (req, res) => {
  const { tag } = req.query;
  if (!tag) {
    return res.status(400).json({ success: false, message: 'Tag is required.' });
  }
  try {
    const response = await NekosiaAPI.fetchCategoryImages(tag);
    if (response.success) {
      res.json({
        success: true,
        imageUrl: response.image.compressed.url,
        sourceUrl: response.source.url,
      });
    } else {
      res.status(500).json({ success: false, message: 'Failed to fetch image.' });
    }
  } catch (error) {
    console.error('Error fetching image:', error);
    res.status(500).json({ success: false, error: error.message });
  }
});

// Start the server and fetch tags on startup
app.listen(PORT, async () => {
  console.log(`Server is running on http://localhost:${PORT}`);
  try {
    await fetchAndCacheTags(); // Fetch and cache tags if necessary
  } catch (error) {
    console.error('Error initializing server:', error);
  }
});
Overall Working and Logic
- Setup and Imports: Load
expressfor server,nekosia.jsfor API calls, andfsfor file operations. - File and Port Constants: Define
TAGS_FILEfor caching tags andPORTfor the server port. - Tags File Check: Use
isTagsFileEmptyto verify iftags.jsonexists or is empty before fetching tags. - Fetch and Cache Tags: Retrieve tags from Nekosia API if necessary and store them in
tags.json. - Static Middleware: Serve static frontend files from the
publicdirectory. - Tags API Endpoint: Return cached tags from
tags.jsonor handle errors if the file cannot be read. - Images API Endpoint: Fetch and return a random image and source URL for a given tag using Nekosia API.
- Server Initialization: Start the server on
PORT, fetch and cache tags on startup if required.
Output
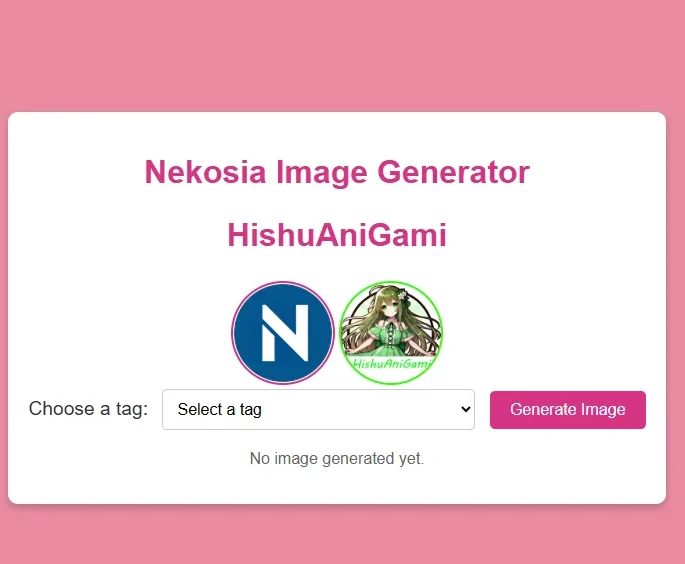
Now that everything is setup and hopefully it is running. If you follow the instructions step by step, then you will find yourself in this screen (You probably won’t see the two logos, but the rest of the functionality will be same)

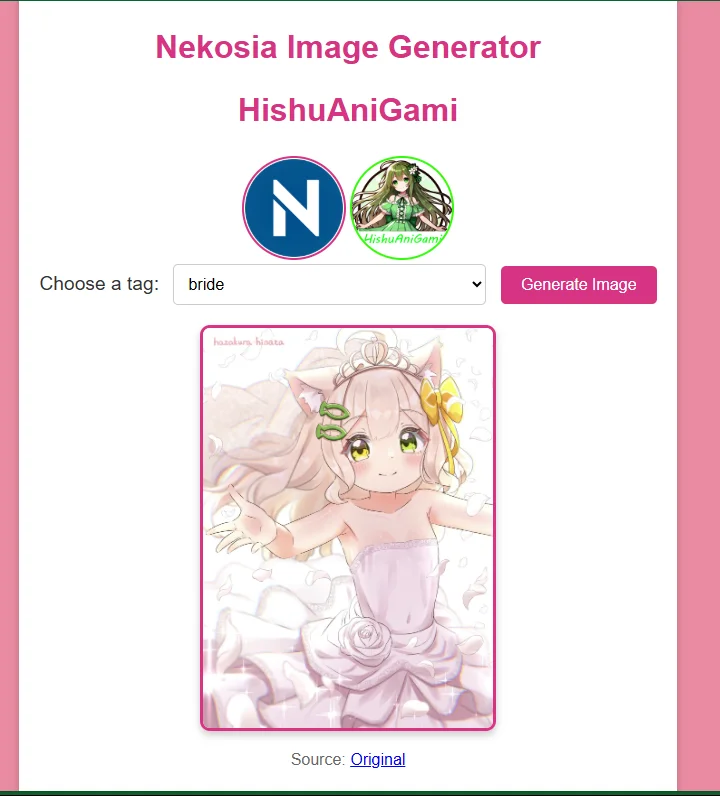
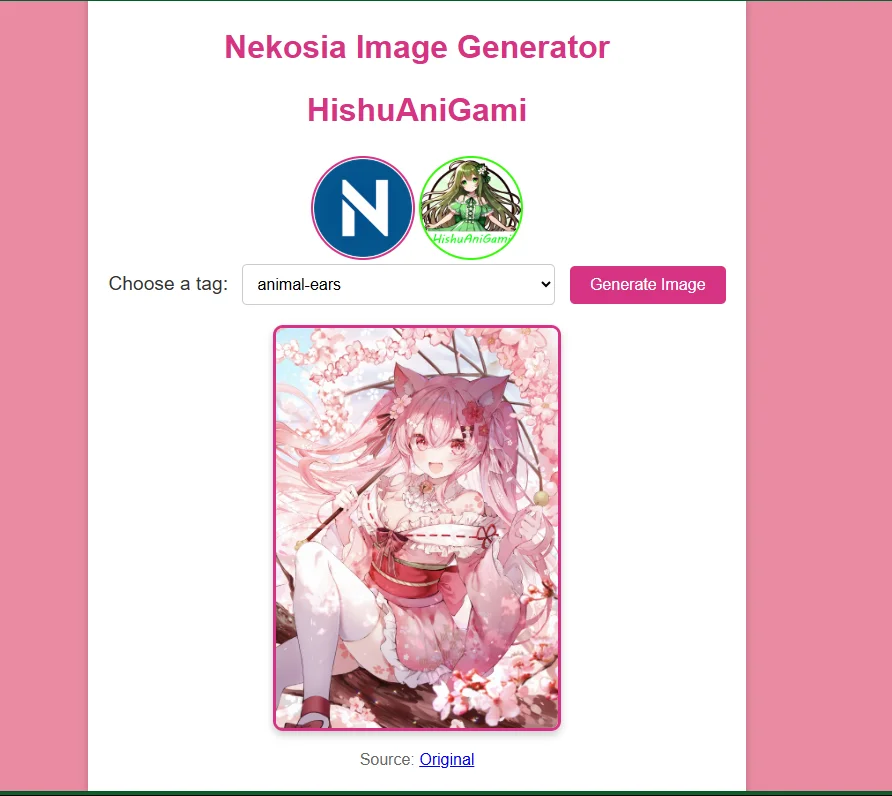
Not let’s select some tags and get some random Anime Images from our own Random Anime Image Generator


Conclusion
And there you have it! 🎉 We’ve successfully built our very own Random Anime Image Generator using the powerful Nekosia API. But why stop here? You can take it to the next level by integrating it into a custom Discord bot, adding it to your personal website, or even creating entirely new features for your fun projects. The possibilities are endless!
A big shoutout to Nekosia Best Anime Neko API for your projects – Nekosia API for making this all possible. Their free and easy-to-use API is a game-changer for developers and anime enthusiasts. If you’re looking to level up your anime-themed projects, be sure to check them out. You won’t be disappointed.
If you want to learn how to parse data in a reliable way, then Creating a Generic JSON Parser in Unity will be your goto guide or if you want to learn how to develop a framework from scratch How to Build Your Own Simple PHP Framework 🎉🎉
Thanks for reading, and happy coding! ❤️❤️❤️
